
Sourdough Brioche Bread
- Rachel

- Dec 15, 2019
- 4 min read
Updated: Jan 22, 2021


Soft, dessert-like bread that will satisfy your sweet tooth and bread heart. I am astounded that you can weigh down a sourdough with so much egg, butter, and sugar and still get a spectacular result! Even though this recipe looked like it was going to hell, the result was amazing! Next time I will work on better gluten development and reduce the sugar, but all and all I'm happy with this attempt.
I simplified the recipe from here, although it would be even easier with a machine mixer: https://www.artisanbryan.com/post/how-to-make-sourdough-brioche-recipe
Ingredients:
Levain:
50 grams Mature Sourdough Starter
25 grams whole wheat flour
75 grams bread or AP flour
100 grams Warm Water
Dough:
250 grams All-Purpose Flour
250 grams Bread Flour
250 grams Levain
115 grams cold Water
175 grams Unsalted Butter
165 grams eggs
175 g sugar (you can reduce to 140 g for less sweetness)
6 grams salt
6 grams Honey
1/2 tsp. (1 g) Vanilla Extract
Directions:
Day 1, Morning:
Mix together levain ingredients. Place in a clean jar and let rise until doubled (about 3-4 hours).
When the levain is ready, mix together the flour and salt in a bowl. Set aside.
Then in a medium bowl add the eggs, water, sugar, vanilla, and honey. Mix well.
Add in your starter into the egg mixture and mix by hand until it somewhat incorporated.
Pour in half the flour and mix by hand well. Then add in the rest of the flour mixture and mix until a dough forms with no dry flour left.
Take out onto a clean work surface and add half the butter.
Mix and knead to incorporate the butter.
Then add the other half of the butter. Mix and knead about 20-40 minutes until a mostly smooth dough forms and it passes the windowpane test. It will be sticky but be patient. The slap-and-fold technique helps.
Then place it in a clean bowl and cover for bulk fermentation (6 hours). I let mine rise in a turned off oven with the light on. If you hand-mixed, you can give it a series of 4 total stretches and folds every 30-60 minutes to continue to help the gluten formation process.
Day 1, Evening:
After you notice your dough is smooth and springy to the touch, cover with plastic wrap so it's touching the dough surface and cover the top of the bowl. Then put it into the fridge overnight to continue developing flavor and a strong structure. Refrigerate 10 hours at 40°F.
Day 2, morning:
Once you complete the cold stage of your fermentation, remove the dough and shape into buns or a loaf. I used 6 140 g balls to make a loaf, and used the leftover 400 g dough to make a little braided loaf, but I think next time I'll use all the dough to make 1 big loaf. Place in/on a greased or lined pan.
Brush your dough with an egg wash and proof for about 4 hours, or until the dough grows noticeably in size and becomes springy to the touch.
Preheat your oven to 375°F, and egg wash your brioche one final time.
Bake brioche for 30-50 minutes (depending on the size of the loaf/buns), or until 200°F internally. I really recommend checking the temperature because they can look done but be raw inside. Allow to cool completely before eating.

The starter before making the levain. It's at peak rise, so it's at maturity.

Levain before rising.

Levain after rising. Time to make brioche!

Mix together the eggs, water, vanilla, and sugar.

After adding the levain and before mixing in.

After partially mixing in the levain.

After mixing in the flour and salt. Next we take it out onto the counter and adding the butter. A lot of butter.

We then mix in the butter (1/2 at a time) and knead. This picture has only half the butter!

After kneading. I maybe should have gone longer, but maybe it will be okay.

Before rising for 6 hours which included 4 sets of stretch and folds.

After rising 6 hours. it won't rise a ton, but that's because there's a lot weighting the starter down.
The next day:

The next day. It looks about the same (hasn't risen a lot).

Cut the dough into the sizes you plan to use. We'll shape 6 pieces for the loaf.

This is how I shape a ball. First flatten on a floured surface.

Then pull in the edges, creating surface tension on the bottom.

Flip it over and shape into as tight of a ball as you can. then place in the prepared loaf tin.

Ready to brush with egg wash and start rising. I used to leftover dough to make a braid:
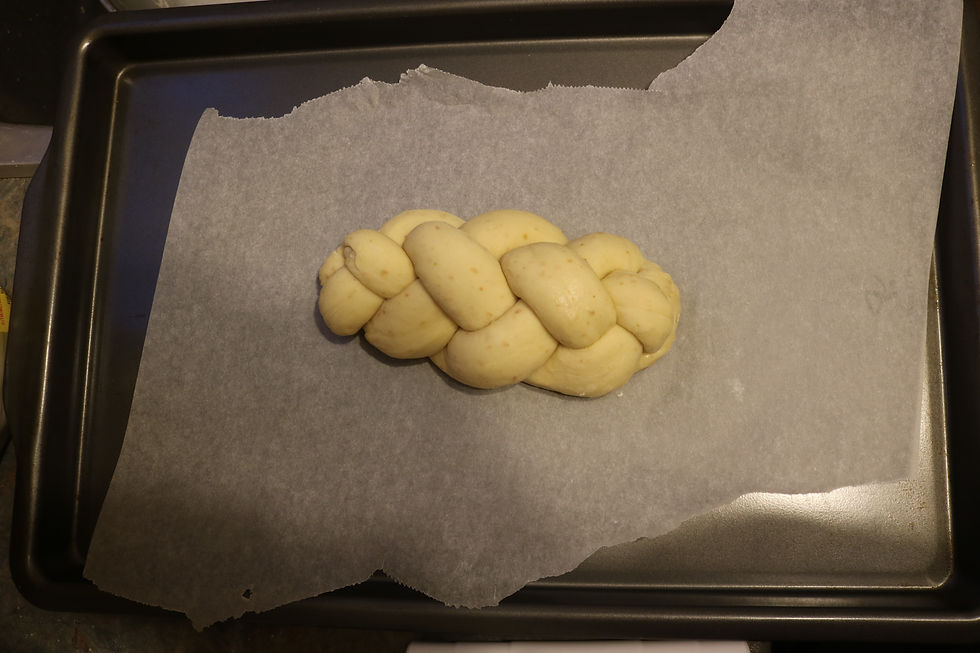
Braided loaf before egg wash and rising.

After rising about 7 hours (longer than the specified 4 hours) and right before baking. As you can see they were pretty flat and didn't double. I thought it was a failure, but the final bake was not too bad! I slightly underbaked the braided loaf but the other was nearly perfect. Next time I'll develop the gluten better and hopefully they'll get a better rise!

After baking! The big loaf was well baked but maybe a bit dark. The braided was under-baked but the bottom was getting to dark!

Nice golden bottom!

Amazing pull apart texture! A little doughy but otherwise perfect!!!

My baby
Comments