
Sourdough Bread 3
- Rachel

- Sep 18, 2019
- 4 min read
Updated: Jan 4, 2021


Another sourdough bread recipe?? Yes! This 73% hydration dough is easy to work with and yields a great oven spring! I baked the loaf in a dark, shallow oval shaped roasting pot which yielded dark and crispy crust. If you want more guidance, YouTube is a great resource for bread making.
878 g loaf, 73% Hydration (370 water/508 dry)
This fantastic YouTube channel (with video demonstration) is where I got my recipe from: https://www.youtube.com/watch?v=vmb0wWKITBQ
Recipes for sourdough starters:
Ingredients:
100 g sourdough starter, fed 12 hours before, or 24 hours before for a more sour flavor
8 g un-iodized salt
320 g room temperature water
350 g bread flour or all purpose flour
100 g whole wheat flour
Directions:
Day 1 around 6 a.m.
Feed your starter 8-12 hours before you plan to use it. It will be bubbly and active when you add it to the bread.
Day 1 Start ~ 3 p.m.
Mix the dough: Add 100 g starter to a medium bowl, saving excess to feed and maintain. Add the flours, salt, and water. Mix by hand and mix very well. Keep folding the dough onto itself, while rotating, until a round dough mass forms that doesn't stick to the bowl too much (about 5-10 minutes).
Cover the bowl and let rest 30 minutes.
First fold: Perform 12 stretch & folds.
Cover and rest 2 hours.
Second fold: Perform 6 stretch & folds. Be gently and try not to lose any air bubbles.
Cover and rest 2 hours. If it's risen a lot after 1 hour proceed to the third fold.
Third fold: If after two hours it's really bubbly and puffy, proceed to the pre-shape (step 8), otherwise do 6 stretch & folds and rest 1 hour more (you can do the windowpane test to see when the gluten is developed).
Pre-shape: roll your dough onto a clean surface, smooth side down, and gently fold the outsides in, shaping into a tight ball, but without crushing/losing too much air (CO2).
Then flip over (smooth side up), shape more if necessary to get it tight, dust lightly with flour, and cover with plastic wrap and rest 1 hour.
Final Shape: Place a smooth kitchen towel well and place inside a narrow bowl or colander/strainer. Flour it well. Then use your hands to fold and pull and shape your dough into a tight ball with a taut surface. Place it, smooth side down, into the floured bowl. Fold the towel over the dough.
Place the wrapped dough in the refrigerator and chill overnight (6-12 hours).
Day 2, morning:
Preheat your dutch oven by placing it in the oven and then turning the oven on to 500°F or 260°C. After it reaches this temperature let it continue heating for 30 minutes. You want the oven HOT.
When the oven is ready, take your dough out of the fridge.
If using a dutch oven: place dough inside, seam side down, and cut a pattern/shape with a razor blade. Cover with the lid. Bake 30 minutes, remove the lid, and bake an additional 15-20 minutes. Remove from pan and cool on cooling rack.
Let bread cool at least 2 hours before cutting into.
Makes 1 loaf but feel free to double the recipe!
Day 1:

The sourdough starter is active (has risen to more than doubled) and is ready to make bread! You can also use it if it's risen and already fallen.

Before mixing together the starter, flours, salt, and water.

After mixing until all the flour is hydrated.
Now we cover and let rest 30 minutes.

After resting 30 minutes. Now we do the first fold:

After the first fold (12 stretch & folds).
Cover and let rest 2 hours.

After resting 2 hours. Now we do the second fold:

After the 2nd fold (6 stretch & folds)
Now cover and let rest 2 hours.

After resting 2 hours. Now we do the third and final fold:

After the third fold (6 stretch & folds).
Now cover and rest 1 hour.

After resting 1 hour. Now we will pre-shape:

Top side after pre-shaping.

Side after pre-shaping.

Lightly dust with flour, cover and let rest 1 hour.

After resting one hour, top-view.
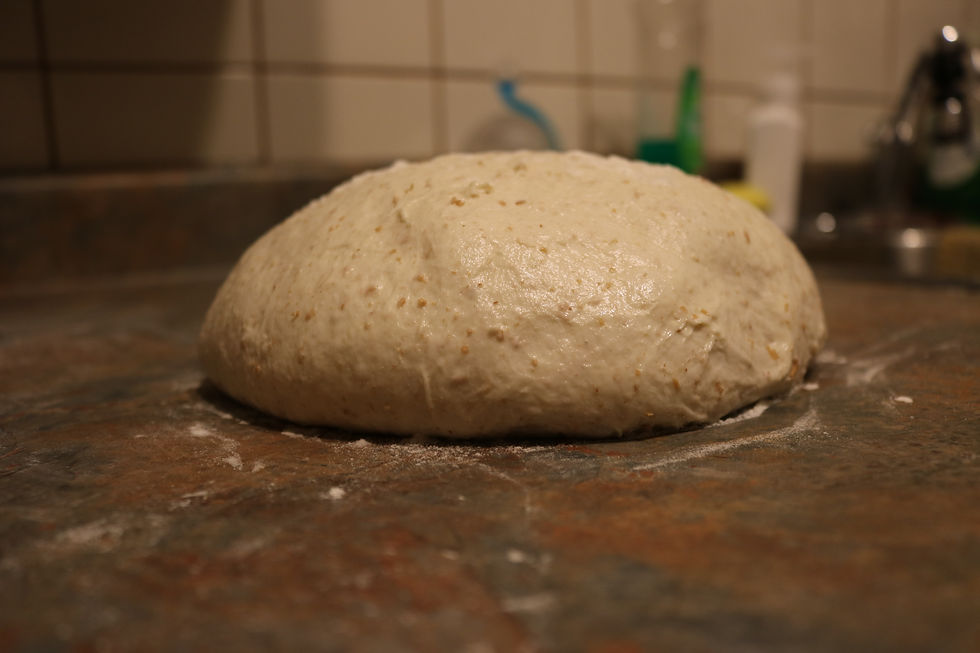
After resting one hour, side-view.
Now we do the final shape:

After the final shape, top-view.

After the final shape, side-view.

Liberally dust a clean pillow case or kitchen towel and place inside a narrow bowl or colander.

Plop your dough in, smooth side down and seam-side up.

Fold the towel/pillow case over and rest in the refrigerator overnight (6-10 hours).
Day 2:

Preheat your dutch oven.

The next morning the dough will look like this, puffy and soft.

Flip it cold from the fridge and into the dutch oven, then score it. You can do any design you like as long as it's quick. As you can see it's not the same loaf pictured at the top.

A closer look at the score, I might have gone too deep...

Then cover and bake 30 minutes with the lid on, then remove the lid and bake another 20 minutes.

And mine looks like this after baking! On this loaf I didn't get a great ear but I did get a great oven spring!

You can made an almost infinite combination of savory and sweet things with this amazing bread!
Comments