
Rosemary Garlic Parmesan Sourdough Bread
- Rachel

- May 2, 2020
- 4 min read
Updated: Jan 22, 2021


Holy goodness. I was thinking, why not add the elements of focaccia into a LOAF? Different properties for sure, especially because there isn't that beautiful olive oil glazed crust. But regardless, this loaf turned out EXCELLENT! The rosemary is stronger than the garlic and parmesan but if you dip it in extra virgin olive oil sprinkled with salt it is MAGICAL.
It's best eaten fresh, or on the same day you bake it!
The recipe is here, pictures of the process are below:
Ingredients:
100 g mature tarter (I use my rye starter 8-12 hours after feeding, the bread will be more sour the longer you wait to use it)
400 g bread flour
50 grams whole wheat flour
9 g un-iodized salt
10 g garlic cloves
20 g olive oil
5 g fresh rosemary, chopped
40 grams grated parmesan (I used parmigiana Reggiano)
320 g water
Directions:
Day 1 Start ~ 2-3 p.m.
Okay, you can just use chopped up oven-roasted garlic, but I didn't want to turn on my oven just for that. So this is what I did: Chop your raw garlic cloves into a relatively coarse mince (see picture below). Add to the olive oil in a small pan. Cook on low heat, swirling occasionally, until its softened and cooked. It should be lightly bubbling but not frying.
Add the starter, flours, rosemary, cheese, garlic, oil, salt to a medium bowl.
Then add in the water. Mix by hand until incorporated. There should be no dry areas.
Cover the bowl and let rest 30 minutes.
First fold: Perform 12 stretch & folds.
Cover and rest 2 hours.
Second fold: Perform 6 stretch & folds. Be gently and try not to lose any air bubbles.
Cover and rest 2 hours.
Third fold: If after two hours it's really bubbly and puffy, proceed to the pre-shape, otherwise do 6 stretch & folds and rest 1 hour more (I did this).
Pre-shape: roll your dough onto a clean surface, smooth side down, and gently fold the outsides in, shaping into a tight ball, but without crushing/losing too much air.
Then flip over (smooth side up), shape more if necessary to get it tight, dust lightly with flour, and cover with plastic wrap and rest 1 hour.
Final Shape: Place a smooth kitchen towel well and place inside a narrow bowl or colander/strainer. Flour it well. Otherwise you can use a floured banneton. Then use your hands to fold and pull and shape your dough into a tight ball with a taut surface. Place it smooth side down into the floured bowl. Cover with plastic wrap and fold a towel over the dough.
Place the wrapped dough in the refrigerator and chill overnight (6-10 hours). Do the poke test to tell if it's risen well (poke a finger in, if it spring back quickly it's no ready, if it springs back slowly and leaves a dent, it's ready, if it doesn't spring back at all it's gone too far).
Day 2, morning:
Preheat your Dutch oven by placing it in the oven and then turning the oven on to 500°F or 260°C. After it reaches this temperature let it continue heating for 30 minutes. You want the oven HOT.
When the oven is ready, take your dough out of the fridge.
If using a Dutch oven: place dough right side up on parchment paper with handles (see below) and cut a pattern/shape with a razor blade. Work quickly. Then use the handles to lower it into the Dutch oven. Cover with the lid. Bake 30 minutes, remove the lid, reduce the temperature to 450°F and bake an additional 15-20 minutes. You can also use the broiler for a few minutes to brown the top but watch it closely. Remove from pan and cool on cooling rack.
Let bread cool at least 2-3 hours before cutting into.
Makes 1 loaf but feel free to double the recipe!

Before cooking the garlic in olive oil.

Ater slow cooking the garlic in olive oil.

Almost all the dough ingredients before adding water and mixing together.

After mixing the dough together. Now cover and rest 30 minutes.

After resting. Now we do the first stretch and fold

After the first stretch and fold. Cover and rest 2 hours. Note: I flipped mine over so the smooth side is up after each stretch and fold so I could track the rise better.

2 hours later. risen a bit and flattened. Time for the second stretch and fold.

After the second stretch and fold. Remember I flipped it smooth side up afterward. Cover and rest 2 more hours.

2 hours later. Time for the last (third) stretch and fold!

After the third stretch and fold. Cover and rest one hour.

After resting one hour. Now it's time to pre-shape!

After pre-shape, top view.

After pre-shape. Side view. Now cover and rest 1 more hour.

After resting one hour, side view. Now time for the final shaping!

Final shape, top view.

Final shape, side view.

Coat the loaf with flour (I use rice flour), and place in a floured banneton.

Wrap in plastic wrap and a towel and rest in the refrigerator overnight.
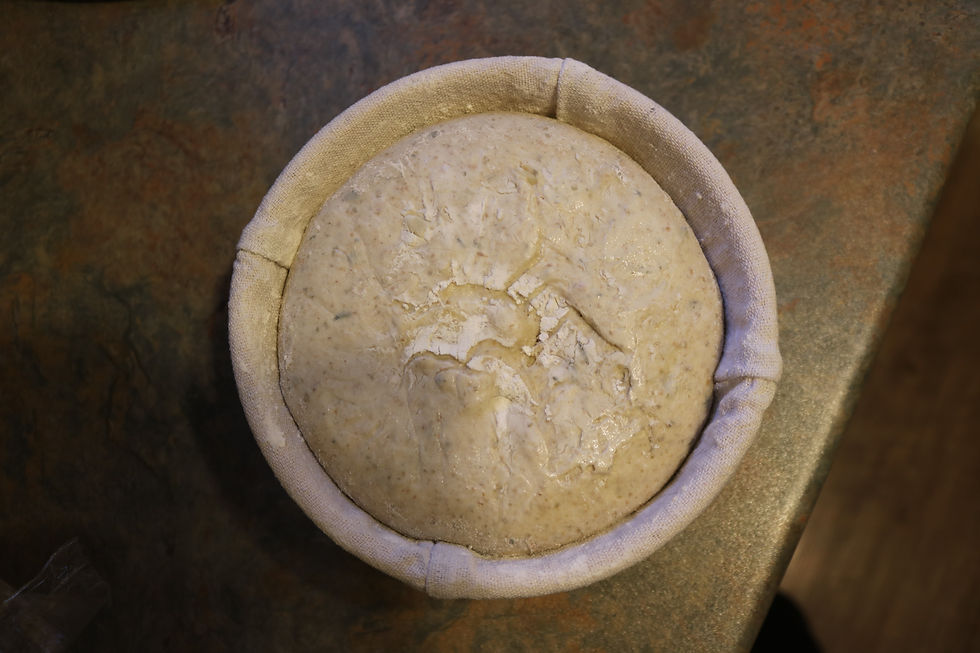
The next morning. Looks a little puffier! We'll keep it cold until we put it in the oven.

My baking setup. I decided to the two Nordicware baking sheets on the bottom because i've had issues with bottoms burning. It seemed to do the trick (that and close monitoring of the bread!)

Plop the dough right side up onto parchment paper with handles (make it yourself), and score (quickly).

After scoring. Side view.

Before baking.

After baking! SO spectacular!

No burnt bottom!!!!

Decent oven spring!

Holy moly ravioli
Comments