Chocolate Challah Bread
- Rachel

- Jun 8, 2021
- 4 min read


Chocolate?? In a bread??? It is simply amazing, the bread has a light chocolate taste throughout and delicious dark chocolate chunks that make it a soft versatile chocolatey delight!!! You can enjoy it plain, with a chocolate spread, peanut butter, butter, or make it into french toast! There's tons of options, and the bread isn't too difficult to make if you have some experience!
The original recipe, which I modified, is from this video tutorial: https://www.youtube.com/watch?v=6vnTvxQDY-k
The recipe is here, and pictures of the process are below:
Ingredients:
373 g bread flour
42 g Dutch-process cocoa powder (or regular cocoa powder)
33 g vegetable oil or canola oil
8 g table salt
60 g white sugar
2 large eggs + 1 egg yolk (cold) (120 g)
6 g instant yeast
120-140 g cool water
100 g semi-sweet or dark chocolate, chopped (or chocolate chips)
Remaining egg white for egg wash
Directions:
Whisk the eggs and egg yolk together. Add in the yeast, sugar, oil, and water. Mix well.
Add the flour, salt, sifted cocoa powder (if it is clumpy), and mix to combine. Once a dough forms and all the flour is hydrated (my dough needed 140 g water for full hydration), take onto a clean surface and knead for 8 minutes.
Cover and rest the dough for 15 minutes, to let the gluten relax.
Then press the dough down and add the chocolate. Fold in and knead until the chocolate is combined with the dough, about 2 minutes.
Place the dough in a lightly greased bowl and cover and rise for 1 hour. I use my oven with the light turned on.
Perform a fold on the dough (see video above at 3:35), folding it about 4-5 times. Return to the bowl, cover and let rise 1 more hour.
Divide and shape the dough into 3 or 4 pieces. Divide and roll out with a rolling pin as flat as you can go (see pictures below), then roll up (like cinnamon rolls) into a log, close the seam, and roll out into a strand.
Once shaped, braid, seal the braid ends, and tuck underneath. Place the braid on parchment paper on a baking tray or in a parchment paper lined light colored (aluminum) loaf pan. Note: baking this in a light colored pan reduces the risk of burning! Cover, and let rise until doubled, about 2 hours.
Preheat a conventional oven to 350°F.
Lightly brush the loaf with the remaining egg white and bake until the loaf is 200°F internally, about 35-50 minutes. In a loaf pan, mine takes about 45 minutes.
Remove from the pan onto a cooling rack. Rest at least 2 hours before cutting into.
Store covered at room temperature up to 3 days, or in the freezer up to 1 month.

The ingredients I used. Feel free to use chocolate chips!

Whisk the eggs and egg yolk together.

Add the water, oil, yeast, and sugar.

And whisk together.

Add the dry ingredients and then you will start mixing the dough together (adding more water if needed).

After mixing the dough together and before kneading.

After kneading until it is mostly smooth. Then you will cover and let it rest 15 minutes to let the gluten relax before kneading in the chocolate.

After resting, covered, for 15 minutes.

Flatten it, add the chocolate.

Fold the edges up, encasing the chocolate.

Then knead until it's combined.

Before the first rise (1 hour)

After the first rise, now we will perform a fold.

Take it onto a surface and flatten it.

And fold it 4-5 times onto itself while rotating, then turn it over and shape it into a ball again.

Before the second rise.

After the second rise. Time to divide and shape!

Before shaping it's a good idea to prep your pan. Here I use my pan as a guide to cut out parchment paper. You can also grease the pan instead, but the parchment paper is very handy!

Another look at the cut and folded paper.

And it should fit into the pan like this! You can instead put the finished loaf on a baking tray lined with parchment or grease.

Back to the dough! Dump it onto a clean surface.

Divide into three equal pieces.

To shape, take one piece at a time.

Flatten it out.

Fold the sides in like a letter.

And roll it up! Pinching it closed once rolled.

And it's ready for a short rest!

Once they are all rolled, cover with plastic wrap and rest about 15 minuets (this lets the gluten relax before rolling out)

After resting, take one at a time.

And roll it out! Tapering it at the ends.

Then attach the strands together at one end. And braid! A normal 3-strang braid, then seel the opposite ends together and tuck underneath.

The final braid! Even though it's not even width it bakes up great in a loaf pan or on a sheet tray!

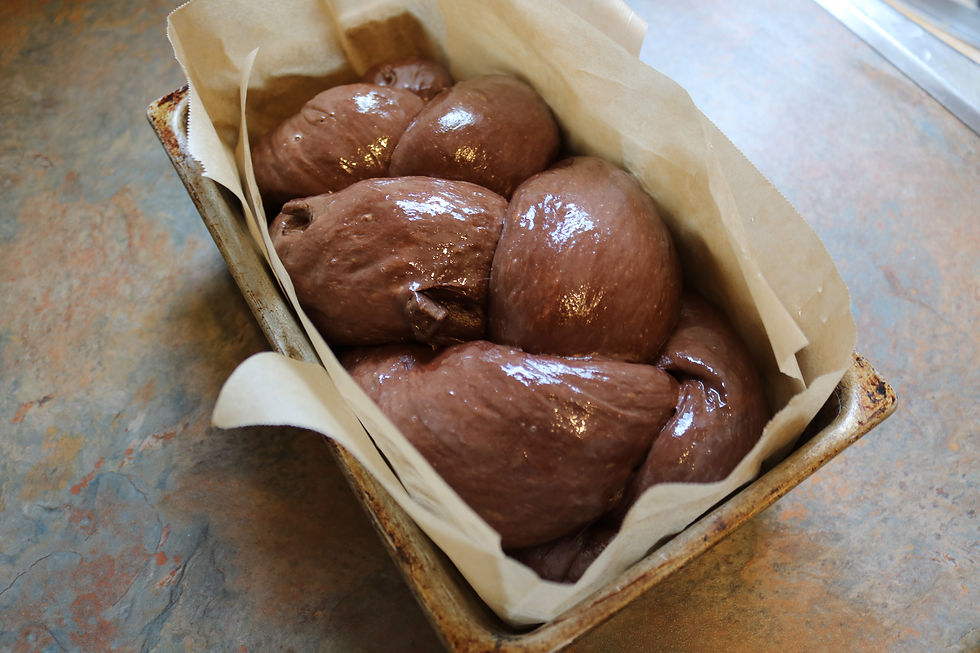
Place in a prepared pan, cover and let it rise one last time.

Side view before rising.

Side view after rising and brushing with egg wash (leftover egg white).

Top view after rising and brushing with egg wash. Time to bake!

Top view after baking Glorious!

Side view after baking!

Remove to a wire rack to cool!

OOOOO look at that curvy lady! She tastes better than she looks :D

The cute bottom, dark but not burnt at all!

Slice and enjoy once cooled!


Comments