
4-Seed Sourdough Bread
- Rachel

- Nov 10, 2019
- 4 min read
Updated: Jun 11, 2020


A nutty and toasty flavored bread with lots of character! Is very good then toasted and buttered! As well as using it for sandwiches. This bread was inspired by all the German/Scandinavian breads I had with one or all of these seeds. You can change out the seeds to your preference. Also, FYI the flax seeds will gel in this bread and make the texture a bit more chewy, so you can switch those out as well!
The recipe is here, and pictures of the process are below:
This makes a 925 g loaf, 76% hydration
Ingredients:
100 g sourdough starter, 100% hydration, fed 12-24 hours before (or at maturity for a less sour taste)
350 g bread flour
100 g whole wheat flour
10 g uniodized salt
340 g water
Seed mix:
5 g flaxseeds
5 g toasted sesame seeds
3 g poppy seeds
10 g sunflower seeds
Additional seeds for coating the loaf
Directions:
Day 1, afternoon ~2-3 p.m.:
Mix together the flours, salt, and seeds.
Add in the starter and water and mix well to combine, with no dry flour visible.
Cover the bowl and let rest 30 minutes.
First fold: Perform 12 stretch & folds.
Cover and rest 2 hours.
Second fold: Perform 6 stretch & folds. Be gently and try not to lose any air bubbles.
Cover and rest 2 hours.
Third fold: Do 6 stretch & folds and rest 1 hour more (you can do the windowpane test to see when the gluten is developed).
Pre-shape: roll your dough onto a clean surface, smooth side down, and gently fold the outsides in, shaping into a tight ball, but without crushing/losing too much air (CO2).
Then flip over (smooth side up), shape more if necessary to get it tight, dust lightly with flour, and cover with plastic wrap and rest 1 hour.
Final Shape: Flour a lined banneton OR place a smooth kitchen towel well and place inside a narrow bowl or colander/strainer. Flour it well.
Then use your hands to fold and pull and shape your dough into a tight ball or long loaf with a taut surface (depending on the shape of the banneton). Lightly brush the surface with water and dip in a seed mixture until top is covered. Then place it, smooth side down, into the floured bowl. Add more seeds to the bottom of the loaf. Then sprinkle with flour and cover with plastic wrap and a towel.
Place the wrapped dough in the refrigerator and chill overnight (6-10 hours).
Day 2, morning:
Preheat your dutch oven by placing it in the oven and then turning the oven on to 500°F or 260°C. After it reaches this temperature let it continue heating for 30 minutes. You want the oven HOT. Note: if you want to avoid burning the bottom of the loaf, place two thick baking trays on the bottom rack and place the dutch oven on the highest shelf it will fit on before preheating.
When the oven is ready, take your dough out of the fridge. Place top side up on prepared parchment paper (see picture below) and score the loaf.
If using a dutch oven: Take the dutch oven out and open it. Lower the loaf inside. Cover and bake 30 minutes, remove the lid, and bake an additional 15-20 minutes at 450°F or 230°C. Remove from pan and cool on cooling rack.
Let bread cool at least 2-3 hours before cutting into.
Makes 1 loaf but feel free to double the recipe!
And here is how I made it:

The starter before making the bread. Mine is a 100% hydration whole grain dark rye flour starter. It had rested about 18 hours after feeding before making this bread.

Mix the flours, seeds, salt together.

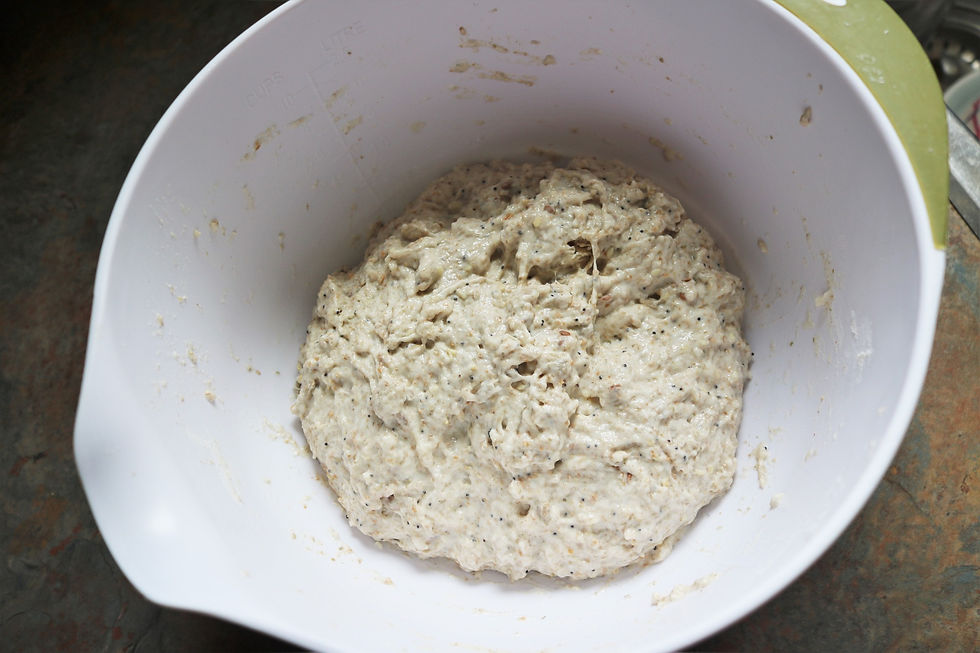
Then add the water and starter.

Mix everything together, then cover and rest 30 minutes.
After resting 30 minutes. Next we will do the first stretch and fold.

After the first stretch and fold. Now cover and rest 2 hours. Note: i flip mine over, smooth side up and seam side down, after the stretch and fold.

After resting 2 hours. Next I flipped it and did the second stretch and fold.

After the second strecth and fold (flipped it smooth side up again.) Cover and rest 2 more hours.

Two hours later. Next I did the final stretch and fold.

After the 3rd stretch and fold. Cover and rest 1 hour.

After resting for 1 hour. Now it's time to pre-shape!

Take the dough out onto a lightly floured surface.

Pre-shape into a ball, flour the surface, and cover 1 hour.

After the 1 hour rest. Now we will do the final shape. Mine is going into a long banneton so it will be shaped into an oval.

It's shaped!

Next I brushed the top and sides of the loaf with water because I wanted to dip it in seeds i had on this plate.

The top and sides are coated in seeds!

Preeettyyy

Plop it (top side of the loaf facing down) into a floured banneton and coat the top (bottom of the loaf) with more seeds! Now it's ready to cover and rise!

I lightly coated the top with flour, covered with plastic wrap and a towel, and placed it in the refrigerator overnight (about 10 hours but check it before that to see if it's well proved).

The next morning, right before baking.

The oven is already preheated with a dutch oven inside. So I put the loaf top side up onto parchment paper. Then I scored it and placed it in the hot dutch oven.

Before covering and baking.

After baking!

So beautiful!

Decent ear on part of the loaf! I had to use a small pan, so I had to adjust my scoring pattern to 2 scores. But i still got a bit of an ear!

The crumb was decent and you can see the little seeds interspersed throughout!
Comments